It is frustrating when a stream abruptly stops when you are enjoying it. Because of this, it is usually advised to test your stream before broadcasting live. Streaming and recording with Streamlabs OBS must be performed with the highest quality settings for the best possible experience. Unfortunately, unlike its larger sibling OBS Studio, Streamlabs OBS makes it challenging to run a test stream because the Bandwidth Test option is absent from the menu.
Follow along while we finish the final Streamlabs OBS procedures for this operation.
ALSO SEE: Disney Plus Not Working On Samsung TV
How To Run A Test Stream Through Streamlabs OBS
To run a Streamlabs OBS test stream, you must utilize the old technique, as previously described. Follow the instructions listed below:
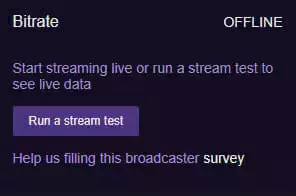
1. Launch Twitch Inspector and Login in to your account.
2. Tap on Run a test stream
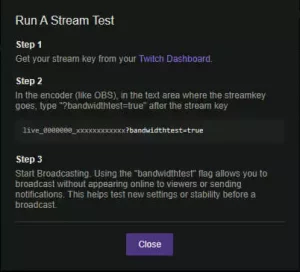
3. Launch the Twitch Dashboard and locate the Streaming Key
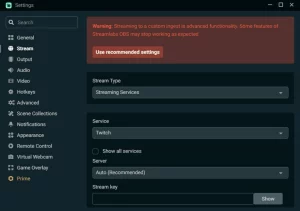
4. Key in Streamlabs OBS
5. Add “bandwidth=true” to the conclusion of your Stream Key.
Using these settings in the initial order, you can do as many test broadcasts with Streamlabs OBS as necessary before fine-tuning each stream component.
Wrapping Up
ALSO SEE: Hisense Roku TV Black Screen
Remember to remove the last extra bit from your stream key before going online since the “bandwidth=true” command will prohibit you from doing so. Now, you and your friends may stream without interruptions. Also, please share this information with your friends to prevent them from experiencing the same problem in the future.